Article
CSS and JavaScript Compilation with Laravel Mix

February 17, 2020 ...

Today, we have a lot of tools and technologies to aid web development. CSS preprocessors like SASS or LESS make writing CSS easier and more powerful than ever. JavaScript keeps evolving with new features added every year. But these options can come with a cost: compatibility.
CSS preprocessors are unlikely to have native support in web browsers any time soon, while JavaScript adds new features faster than we can implement them into web browsers. That means developers need to compile (or transpile) this code into something that works across browsers. And this comes with one big wall to climb.
Yes, I am talking about configuring the webpack.
Fortunately, there is a tool that can make this easy. Let me introduce you to Laravel Mix.
Laravel Mix
Anyone remember their first time trying to make webpack work? It was a pain for many people. And that made a good portion of web developers opt out of using it. But with Laravel Mix, which is basically a webpack wrapper, everything comes down to just two lines of configuration.
As its name suggests, Laravel Mix is part of one of the most popular PHP frameworks: Laravel. But Laravel Mix can also be used on standalone projects, as well as WordPress themes.
Earlier we had mentioned Sage 9, a starter theme with webpack preconfigured. See links below for more details:
Requirements for Laravel Mix are minimal. You only need Node.js, one of the good package managers (like npm or yarn) installed, and basic knowledge of command line usage.
For those who use Windows, installing a command line tool can be challenging. Vagrant images like VVV or Homestead can be a lot of help.
Installation
Open command prompt or Terminal, go to your project directory, and install laravel-mix via npm or yarn. We also recommend installing the package cross-env as well. This package will handle the cross-environment usage, especially on Windows.
// For npm users
$ npm install laravel-mix cross-env --save-dev

// For Yarn users
$ yarn add laravel-mix cross-env --dev
The latest version of cross-env required Node 10. If you are using Node 8, you need to install cross-env@6 instead.
I personally ran into a problem with
node-sasswhich I had installed globally and worked fine with other projects. If you run into this problem as well, just installnode-sassin your project.
Then copy the configuration file from node_modules/laravel-mix/setup/webpack.mix.js to your project root directory
$ cp node_modules/laravel-mix/setup/webpack.mix.js ./
Now open file package.json and add these configs into the file, right before the last end curly bracelet, or add them inside scripts section if it already has one.
"scripts": {
    "build": "cross-env NODE_ENV=development node_modules/webpack/bin/webpack.js --progress --hide-modules --config=node_modules/laravel-mix/setup/webpack.config.js",
    "build:production": "cross-env NODE_ENV=production node_modules/webpack/bin/webpack.js --no-progress --hide-modules --config=node_modules/laravel-mix/setup/webpack.config.js"
}
So, what are those commands?
scripts section in package.js is like a command line shortcut. If you run npm run build or yarn build, the package manager will run the long command (which no one wants to remember) associated with the keyword. In this case, use commands to build assets for either local or production.
// for npm users
$ npm run build
$ npm run build:production

// for Yarn users
$ yarn build
$ yarn build:production
The main difference between build and build:production is the first will contain a source map, which can tell you where the current part of CSS or JS is located. The latter won’t have this, and the output is also minified.
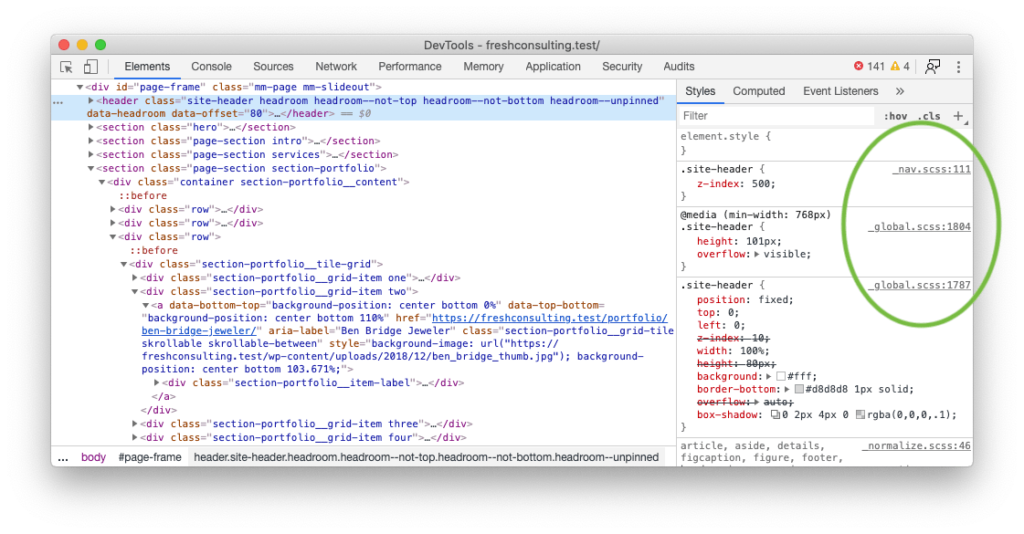
Development build contains a source map
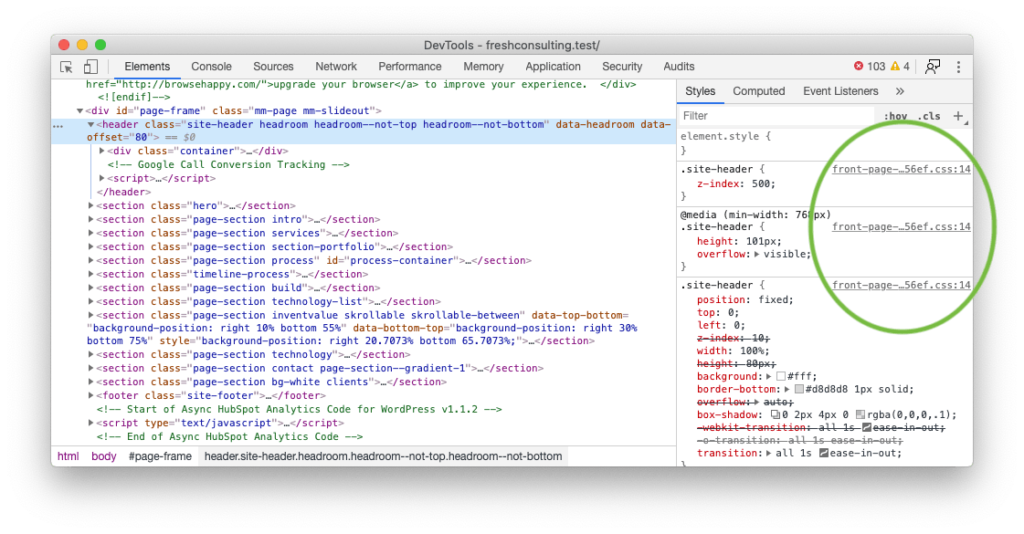
Production build doesn’t contain a source map
You can also tell webpack to watch files change and re-compile them automatically by adding the watch argument.
// for npm users
$ npm build -- --watch

// for Yarn users
$ yarn build --watch
Yes, npm required extra empty -- argument to work.
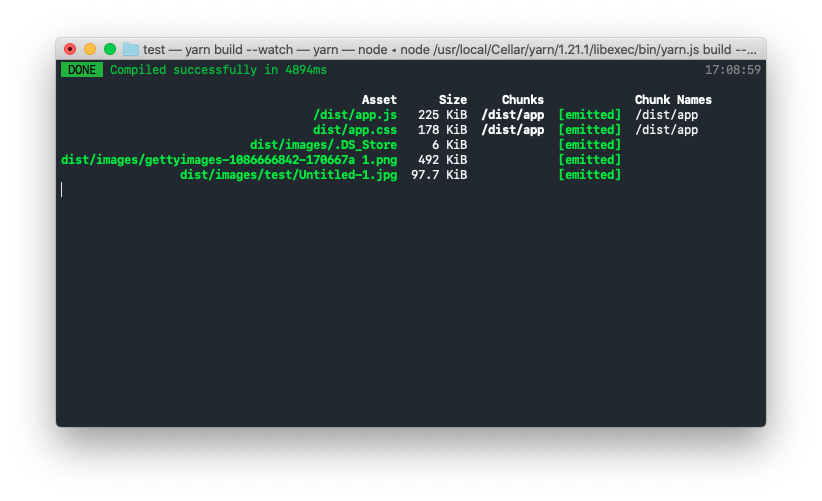
Webpack is watching for file changes
At this point, Laravel Mix is ready to use. The default CSS and JS files are src/app.scss and src/app.js, respectively. They will put compiled files in dist/ directory. But we will adjust it a bit to make sure the file’s structure suits your needs.
Change directories structure
As we mentioned, the default directory for JavaScript and SCSS files is src/ and default output directory is dist/. But we can easily change this. For example, we will change source directories and files to assets/styles/main.scss for the stylesheet and assets/scripts/main.js. The output will be dist/styles/main.css and dist/scripts/main.js, respectively.
Open the file webpack.mix.js we copied in the previous step. There will be a lot of configurations inside the file but most of them are commented out. It actually needs just the following two lines to work:
let mix = require('laravel-mix');

mix.js('src/app.js', 'dist/').sass('src/app.scss', 'dist/');
The second line is where you can specify the resource entry file, and where the compiled resources will be located via the method corresponding to resource type.
At this step, we recommend you to start with setPublicPath(). This will be your root path for compiled assets as well as other resources.
let mix = require('laravel-mix');

mix.setPublicPath('./dist');
Then you still tell Laravel Mix about your resources entry files and where to put them relative to setPublicPath().
For example, if you want to compile a JavaScript file located at assets/scripts/main.js, put the compiled file into dist/scripts/main.js and an SCSS file located at assets/styles/main.scss to dist/styles/main.scss. You can update the settings to something like this:
let mix = require('laravel-mix');

mix.setPublicPath('./dist');

mix
  .js('assets/scripts/main.js', 'scripts')
  .sass('assets/styles/main.scss', 'styles');
If you have multiple entry files, you can add them to the configuration as well.
let mix = require('laravel-mix');

mix.setPublicPath('./dist');

mix
 .js('assets/scripts/main.js', 'dist/scripts')
 .js('assets/scripts/inner-page.js', 'dist/scripts')
 .sass('assets/styles/main.scss', 'dist/styles');
And that’s all! You can now run build script to compile the resources.
To use the compiled file, just call normally via <script> and <link> tag:
<script src="dist/scripts/main.js"></script>
<link rel="stylesheet" href="dist/styles/main.css">
Or if the project is a WordPress theme, you can enqueue them just like your other assets:
<?php
add_action('wp_enqueue_scripts', function () {
  wp_enqueue_style('main-style', get_stylesheet_directory_uri() . "/dist/styles/main.css", false, null);
  wp_enqueue_script('main-js', get_stylesheet_directory_uri() . "/dist/scripts/main.js", ['jquery'], null, true);
}, 100);
And don’t forget to add directory dist/ into your .gitignore file
As mentioned above, this file also contains a lot of configurations, but they were commented out. Those settings will let you compile other types of resources such as CoffeeScript, TypeScript, LESS, Stylus, as well as change other settings like webpack itself, or BrowserSync.
Use external jQuery
CMSs like WordPress are often shipped with built-in jQuery. While you can always install another jQuery via npm, it’s a good idea to use the built-in to keep the compatibility in place and get rid of some unneeded bytes.
Laravel Mix lets you adjust other settings, including webpack, by passing configuration into webpackConfig() method. With the externals key, you can tell which library call will instead use an external one (the one you called via <script> tag)
mix.webpackConfig({
  externals: {
    jquery: 'jQuery'
  }
});
Then in your JavaScript file, you just need to declare import 'jquery' and it’s ready to use.
Bootstrap via npm
Bootstrap is still popular for web development. Normally we would just include a compiled CSS and JavaScript for Bootstrap, but since we are now using package manager, why don’t we install Bootstrap via package manager and empower its full potential?
Let’s install the require packages via npm or yarn
// for npm users
$ npm install bootstrap popper.js

// for Yarn users
$ yarn add bootstrap popper.js
You will need to install jquery as well if you aren’t using external jQuery. Then import Bootstrap JavaScript and SCSS files into your files.
// assets/scripts/main.js
import 'bootstrap';
For SCSS file, first you need to create another file. Let’s say: assets/styles/common/_variables.scss and @import this file before you import the actual Bootstrap SCSS.
// assets/styles/main.scss
@import "common/variables";
@import "~bootstrap/scss/bootstrap";
Ok, here is where the magic and the rabbit hole begins. Bootstrap will let you override some configuration before it builds the actual CSS file, by overriding some SCSS variables.
For example, Bootstrap’s primary color is blue, or #007bff to be exact. If you want to change the default primary blue to #3480eb, you can just override $blue variable in _variables.scss
You can even add new screen breakpoints or change screen width for each breakpoint via $grid-breakpoints variable.
// This change default blue color
$blue: #3480eb;
// This add another breakpoint: xxl
// You can use new breakpoint like: <div class="col-xxl-12">
$grid-breakpoints: (
  xs: 0,
  sm: 576px,
  md: 768px,
  lg: 992px,
  xl: 1280px,
  xxl: 1900px
);
And here is the rabbit hole part: you can find all overridable variables in node_modules/bootstrap/scss/_variables.scss. Any variables with !default declaration are overridable.
Overriding Bootstrap settings is a more ideal solution to manually override Bootstrap classes via CSS.
Optimize images with imagemin
While Laravel Mix already provides tons of features, you can also add more via extensions! (The complete list is located here). We will use extension laravel-mix-imagemin to optimize images as an example.
First, put all your images in assets/images/ directory. Optimized files will be at dist/images/. This is to maintain the directory structure so there won’t be any problem when you call an image from SCSS file.
Now install the extension:
// for npm users
$ npm install laravel-mix-imagemin --save-dev

// for Yarn users
$ yarn add laravel-mix-imagemin --dev
Then open webpack.mix.js again and add this configuration:
mix
  .imagemin([
    {
      from: 'assets/images/',
      to: 'dist/images/'
    }
  ]);
Once you run the build script for the first time after editing this file, Laravel Mix will install all the required dependencies for the extension, and you will need to run the build script again. This is only a one-time thing. Resources will be copied from assets/images/, optimized, and put into dist/images/
Deployment
Here comes the one big mistake made by many people who just get their hands on the package manager. They upload the entire black hole node_modules directory onto web hosting. (Don’t even mention FTP upload.)
You now have the compiled assets sitting inside dist/ directory. You can just upload only this directory onto web hosting, and leave actual node_modules Residing In Place only on your local development, as well as the assets/ directory.
And that’s all. Happy coding!